
- How can I apply for access to the online courses?
- Can I take more than one course?
- Will I receive a certificate when I finish an online course?
- Are the online courses free?
- How can I contact you when I encounter any issues accessing the DICT-ILCDB courses on Coursebank?
- About the DICT-ILCBD Programs
- Are scholars under other DOST scholarship programs allowed to join SPARTA?
- Why haven't I received any email about my application status?
- How to upgrade to Verified access in SPARTA courses?
- Do SPARTA scholars have to render service to any government and/or private offices in the country for six (6) months after completing the program?
- Will scholars who failed to finish their pathway still need to render the RSA?
- What are the six (6) learning pathways?
- What should I do if I fail peer-graded assignments or used up all attempts to pass the assessments in Project SPARTA courses?
- Why does my assignment take so long to be graded?
- What is the nature of Project SPARTA courses?
- How much do the courses cost?
- Can I apply for multiple learning pathways in Project SPARTA?
- What is the difference between audit and verified access?
- Which course would you recommend for someone who has little knowledge of Data Science and Analytics?
- Why does my assignment take long to be graded?
- My company/organization is interested in becoming a SPARTA partner. Who should we contact?
- Is there an imposed travel bond (including leisurely travels) within six (6) months after taking SPARTA scholarships?
- Will I receive a certificate when I finish a certain course and a learning pathway?
- How many learning pathways am I allowed to take?
- How will Project SPARTA track the return service agreement?
- Is there a penalty for failure to render the six-month service obligation?
- Is there a ranking or a tiering system for the pathways?
- When will the RSA start?
- What specifications of laptop or gadget do you recommend for SPARTA courses?
- Will my courses from my previous pathway be credited if I switch to another pathway?
- Will scholars who withdrew from SPARTA still need to render the RSA?
- Can the courses be credited as training hours? How do I calculate it?
- What will happen if I cancel my SPARTA scholarship?
- What is the difference between main pathways and microspecialization pathways?
- Are SPARTA courses and pathways equivalent to a master's or bachelor’s degree?
- Is the SPARTA scholarship available to OFWs?
- How long can I complete a Project SPARTA course?
- Why can’t I enroll in any of the courses with TBA status?
- What is a capstone course?
- How can I generate my pathway certificates?
- Do scholars need to complete a capstone course to obtain a microspecialization certificate?
- What is the difference between Honor Code and Honor Certificates?
- How do I change my enrolled main pathway?
- How will I know which pathway best suits me?
- How can I enroll in SPARTA courses?
- How many days will I have to wait to know if my scholarship application is approved or not?
- What is Project SPARTA?
- How can I apply for the Project SPARTA scholarship?
- What are the eligibility and documentary requirements to become a SPARTA scholar?
- Why do I have to completely update my information on my Profile Page?
- How do I cancel or withdraw from the SPARTA scholarship?
- Privacy Policy Pertaining to Your SPARTA Scholarship
- How are peer assessment scores calculated?
- How to provide feedback on peer assessments you received?
- How to receive your ORA assignment score?
- How to submit a file with your ORA response?
- How to view your submitted response?
- Steps in an Open Response Assessment (ORA) assignment
- How to view your staff grade?
- How to assess your own response?
- How to assess peer responses?
- Learn how to assess peer responses
- How are open response assessments graded?
- How to submit your response to an Open Response Assessment question?
- How to complete essay assignments?
- Who grades my assignment in an open-response assessment?
- How do I verify my identity?
- How do I activate my account?
- How do I register in CourseBank?
- How can I delete my account?
- How do I change my name on my account?
- Taking a picture of your photo ID
- Taking a photo of yourself using your webcam
- Updating Your Account Information
- My Account is Locked
- What if I forgot my password?
- What if I am having login problems or forgot my password?
- Recommended Browsers and Devices
- Why I haven't received my activation email?
- What should I do when I cannot log out of my account? Or what should I do when I cannot click certain tabs on the LMS?
- How to subscribe to Coursebank mails to get the latest system, program, and course updates?
- What is a self-paced course? How does it work?
- Is there a walk-through of a sample course session?
- What if I have a question about course grading?
- How can my course be marked as completed?
- Why doesn't the green progress check mark appear?
- How do I enroll in a course?
- What can I do to get green checkmarks in all course contents?
- Will my certificate include a grade and/or number of credit hours?
- Why is there no option to upgrade?
- What is the deadline to upgrade to a verified certificate?
- What is a verified certificate?
- Does Coursebank offer free certificates?
- Can I get a paper copy of my certificate?
- What types of certificates does CourseBank offer?
- How to view and download my certificate
DICT-ILCDB Programs
In collaboration with the Department of Information and Communications Technology (DICT), ICT Literacy and Competency Development Bureau (DICT-ILCDB), and Digitaljobsph, Coursebank offers a total of 36 FREE online courses now open to the general public.
Initially, the objective of Enhancing Information and Communications Technology Upskilling Ecosystem through Massive Open Online Courses is to elevate the skills of the Philippine Government’s Information Technology (IT) professionals to help them better perform their mandate of ensuring a successful digital transformation for their respective agency, LGU, or SUC. The program also aims to train the next generation of government IT professionals well versed in cutting-edge technological tools and skills in emerging fields such as AI, Big Data, IoT, and Cloud.
This training program will be delivered through asynchronous online training considering best practices in global leaders of massive open online courses.
Click HERE to learn more about the programs in collaboration with Coursebank.
Open Response Assessments
- Peer assessments are scored by criteria. The score for each criterion is the median (not the average) of the scores that each peer assessor gave that criterion. For example, if the Ideas criterion in a peer assessment receives 10 from one learner, 9 from a second learner, and 5 from a third learner, the score for that criterion is 9 (the median), not 8 (the average).
Your final score for a peer assessment is the sum of the median scores for all of the criteria.
Options
- For example, your response might receive the following scores from peer assessors.
-
Criterion Name Peer 1 Peer 2 Peer 3 >Median Ideas (out of 10) 10 7 8 8 Content (out of 10) 7 9 8 8 Grammar (out of 5) 4 4 5 4 FINAL SCORE (out of 25) 20 - When you assess a response, you evaluate the response, and for each criterion, select the option that best describes how well the response met that criterion.
To calculate the final score, the system adds the median score for each criterion:
- Ideas Median (8 out of 10) + Content Median (8 out of 10) + Grammar Median (4 out of 5) = Final Score (20 out of 25)
Note, again, that your final score is not the median of the scores that each individual peer assessor gave the response. Your final score is the sum of the median scores for all of the criteria.
Note: If a staff grade is provided in the assignment, either because a staff assessment step was included or because a member of the course team graded your response to override inappropriate peer assessments, peer assessments are not used for grading. If a staff grade exists, it is always your final grade.
- If you want to, you can provide feedback on the peer scores or comments that you received in an ORA assignment, under Provide Feedback on Peer Assessments.

- You receive your score for an open response assessment when you have completed the following steps.
- Submitted your response to the question.
- Completed the assessment training step (if included).
- Performed the required number of peer assessments.
- Performed a self-assessment (if included).
- Received the required number of peer assessments of your own work.
- Received a staff assessment (if included).
If other learners are still assessing your response, you see the following message below the Assess Your Response step:
1. Your Grade: Waiting for Peer Assessment
- Your response is still undergoing peer assessment. After your peers have assessed your response, you will see their feedback and receive your final grade.
- If you see this message, check back periodically until peer assessments of your work are complete.
2. View Your Score
- When peer assessment is complete, and if the assignment does not include a staff assessment step, you can see the scores and any comments that you received from peers who assessed your response. You also see the scores from your self assessment.
- If the assignment included a staff assessment step, you receive your final grade after a member of the course team grades your response. In this case, your score details will include peer assessment scores and comments, but the staff grade becomes your final assignment grade.
- If you want to, you can provide feedback on the peer scores or comments that you received.
- If your ORA assignment requires or allows you to submit images or other types of files, you see two buttons below the response field: Choose Files one one side of the page, and Upload Files on the other side of the page.
Note: The cumulative size of the files that you upload must be less than 10 MB. Image files can be in .jpg, .gif, or .png format.
- Depending on the requirement of the Subject Matter Expert, they may also require learners to submit files in .xlsx and .zip file format.
To upload files in your response:
- Below the responses field, select Choose Files.
- In the dialog box that opens, select the file that you want to upload, and then select Open. A preview image of each file is visible.
- In the boxes next to each preview image, enter a written description of the image. This step is required to help learners who cannot see or access the image understand and evaluate your response.
- Across from the Choose Files button, select Upload files.
Note: You can replace the files that you uploaded with different files until you submit your response. To replace your uploaded files, repeat steps 1-3.
1. You can view your own response in an ORA assignment at any time after you submit it.
2. Select the Your Response heading in the assignment to expand the section
3. Your response appears, along with the status of the response, and information about additional steps you have to complete before you receive your grade.
- Open response assessments can have several possible steps, which appear in the order that you must complete them. Future steps are not available until you complete your current step. This topic describes all of the possible steps. The actual steps in your assignment depend on how your course team has designed the assignment.
- Your Response: In this first step in an open response assessment, you submit your response to the assignment question.
- Learn to Assess Responses: In this step, you practice grading some responses. You evaluate example responses and then see how the grade you gave differs from the grade that a member of the course team gave. The goal is to learn how to assess responses similar to the way that course staff would assess them, using the same rubric.
- Assess Peers: You grade responses that other learners in the course have submitted, and other learners in the course grade your responses.
- Assess Your Response: In this step, you assess your own response, using the same rubric that you used to perform peer assessments.
- Staff Grade: Members of the course team assess your response. If you receive a staff grade for your assignment, it always overrides any peer assessment grades that you receive.
Note: Course staff can grade your open response assignment even if a staff assessment step is not included in the assignment. This might happen if, for example, you receive peer assessments of your response that are inappropriate. In such cases, course staff can perform an assessment of your response that overrides any peer assessment grades.
- In some open response assessments, a staff assessment step is included for a member of the course team to grade your responses. You do not need to take any action for this step. The status of the Staff Grade step changes to Complete when a member of the course team has completed grading your response.
- If a Staff Grade step exists in your assignment, you receive your final assignment grade when staff grading is complete, even if your response has not been assessed by the required number of peer reviewers.
Note: Course staff can grade your open response assignment even if a staff assessment step is not included in the assignment. This might happen if, for example, you receive peer assessments of your response that are inappropriate. In such cases, course staff can perform an assessment of your response that overrides any peer assessment grades. If a member of the course staff has graded your response, a Staff Grade section appears in the grading details for your assignment.
- When you have completed the required number of peer assessments in your ORA assignment, the self assessment step of the assignment becomes available. You see your response along with the same rubric that you used in the peer assessment step.
- Perform an assessment of your own response,
- And then select Submit Your Assessment.
- When you have completed assessing your own response, the next step in the assignment becomes available. If there are no further steps, and if you have received the required number of peer assessments on your own response, you can receive your score.
- In the peer assessment step of an open response assessment, you perform assessments of responses that were submitted by other learners in your course. The course team sets the requirement for how many peer assessments each learner is expected to complete. The requirement may vary depending on the course you are enrolled in.
How to Assess Peer Responses
- At the top of the peer assessment step, you can see counts of how many responses you are expected to assess and how many you have already assessed. For example, if you are required to perform 3 peer assessments and are about to start your first peer assessment, the count appears as “1 of 3”.
Note: If there are no submitted responses available for grading, a status message indicates that no peer responses are currently available for you to assess, and that you should check back later. - Within the Assess Peers step, you see each question, a learner’s response, and the rubric that you will use to grade the response.
- You assess other learners’ responses by selecting options in the rubric. This process will be familiar to you if your assignment included the learn to assess responses step. Additionally, this step has a field below the rubric where you can provide comments about the learner’s response.
Note: In addition to a field for overall comments on a learner’s response, some peer assessments include Comments fields for individual criteria that allow you to enter up to 300 characters. In some assessments, you must enter comments before you can submit the assessment. - After you have selected options in the rubric and provided comments about the response, select Submit your assessment and move to response #{number}
- After you submit each peer assessment, a response from another learner becomes available, until you have assessed the required number of responses. The count of how many responses you have assessed updates after you assess each response.
- When you have completed the required number of peer assessments, the next step in the assignment becomes available.
Optional: Assess Peer Responses
- If you have assessed the required number of peer responses, the peer assessment step collapses so that only the Assess Peers heading is visible.
- If you want to, you can assess more peer responses than the assignment requires. To assess more responses, select the Assess Peers heading to expand the step, and then select Continue Assessing Peers.
- Some open response assessment (ORA) assignments include a training step, so that you can learn how to effectively assess responses for a later peer assessment step.
- In a training step, you evaluate example responses using a provided rubric as a guide for grading. After you complete the grading, you are shown how the grades you gave differ from the grades that a member of the course team gave. The goal is to learn how to assess responses similar to the way that course staff would assess them, using the same rubric.
To Learn How to Assess Responses:
- Read each sample response and the rubric carefully, then for each criterion, select the option that you think best reflect the response.
-
When you are satisfied with your assessment, select Compare your selections with the instructor’s selections.
- If all of your selections are the same as the instructor’s selections, the next sample response opens automatically.
- If any option that you select is not the same as the instructor’s selection, you see the response again, with a message indicating that your assessment differs from the instructor’s assessment.
- If your assessment did not match the instructor’s assessment, review the response again and consider why the instructor assessed the response differently than you did. Continue to assess the example response until the options you select for all criteria match options selected by the instructor.
When you have successfully assessed the sample responses, the next step in the assignment becomes available.
- Grading for every type of assessment step in an ORA assignment is done by comparing each response against the same set of guidelines, called a rubric. Every open response assessment has a rubric provided by the course team.
- A rubric consists of several criteria and a set of options for each criterion.
Criteria
- Each criterion describes characteristics that a response should have.
- For example, "Determine if there is a unifying theme or main idea" or "Assess the content of the submission" are possible criteria for assessing a response.
Options
- Each criterion has options which describe how well each response satisfies the criterion. The options are usually a range of ratings, with details to help you decide the rating, and an associated point value.
- For example, this table shows the options for the criterion "Determine if there is a unifying theme or main idea".
-
Option Description Points Poor Difficult to understand the main idea. Too brief or too repetitive to establish or maintain a focus. 0 Fair Presents a unifying theme or main idea, but includes minor tangents. Stays somewhat focused on topic and task. 3 Good Presents a unifying theme or main idea without going off on tangents. Stays completely focused on topic and task. 5 - When you assess a response, you evaluate the response, and for each criterion, select the option that best describes how well the response met that criterion.
- Submitting your response is usually the first step in an Open Response Assessment (ORA) assignment.
- To submit your response to an Open Response Assessment question
- Read each question carefully: Some course teams include important information in the question, such as how long a response must be, or specific topics that your response must cover. Note that the total word count for your response cannot be more than 10,000 words.
- Enter your response: For each question, enter your response into the field under Your Response. In some assignments, you can submit images or other types of files along with or instead of a written response. If available, Browse and Upload your files options appear below the response field. For information about uploading images or other files in your ORA assignment, see Submit a File with Your Response.
- When you have finished answering all of the questions, select Submit your response and move to the next step.
- If you need more time, you can select Save Your Progress to save a draft of your responses, and then come back and submit them later.
- After you submit your response, the next step, which is usually either assessment training or peer assessment, becomes available. However, you do not have to start the next step right away. If you want to stop working and come back later, just refresh or reopen your browser when you come back.
- For more information about the steps in an ORA assignment, see Steps in an ORA assignment
- In some courses, you are asked to write essays in response to topics or to questions that do not have simple answers. These essay assignments are called open response assessments (ORA) because they have a flexible design, and can include various assessment options, including peer assessments and self assessments.
- In some ORA assignments, in addition to writing text responses, you can submit an image or other type of file. For information about uploading images or other files in your open response assessment, see Submit a file with an ORA response.
- For more information and on how to work with open response assessments, see the following articles:
1. As members of the online community, each learner is tasked to evaluate his/her peers' assignments and vice versa.
Account Basics
1. In order to earn a Verified Certificate, you'll need to verify your identity. This is accomplished by taking a photo of yourself & a photo identification card from your computer or smartphone. For best results:
- Make sure your face is well lit and fills the picture window in the first image. Optimal camera positioning varies with each computer, but generally the best position for a headshot is approximately 12-18 inches (30-45 centimeters) from the camera, with your head centered relative to the computer screen.
- Make sure your photo identification card fills the window and your name is visible in the second photo. Generally, the best position for a photo of an ID card is 8-12 inches (20-30 centimeters) from the camera, with the ID card centered relative to the camera.
- The name on your ID must exactly match the full name you have on your CourseBank account, including being in the same language/alphabet. If needed, you can change the name on your account to match your ID.
- Do not submit blurry photos. If the image you submit is rejected as unreadable, try moving the camera slightly relative to the room’s main light source, which should be in front of your face or ID card.
2. After you submit your verification photos, you can see your verification status on the right side of your dashboard. Normally, ID verification review takes 2-3 business days. If your photos are denied for any reason, the reason for denial will be listed on your dashboard, and you'll see a button to resubmit your verification photos.
Note: If your computer does not have a camera, CourseBank recommends that you use any other computer to take the images. You may then return to your computer to take the courses.
1. After registering, you will receive an activation email at the email address you entered during registration. Select the link in the email to activate your account.
2. If you do not see the activation email in your email inbox see Why Haven't I received my Activation email?
CourseBank courses are open to everyone. All you need is access to a computer with a current browser, an Internet connection and, of course, a desire to learn.
To begin, please register for an Coursebank account. You will need to:
- Enter your email address
- Enter your full name (Your full name will appear on any certificates that you earn.)
- Create a public username for the forums (cannot have spaces)
Note:You cannot change your username once it has been created. - Create a password
- Select your country
- Select Create your account
When you find a course that interests you in the course catalog, you can enroll in the course by selecting the Enroll Now button on the course About page.
1. How do I delete my account and personal data on CourseBank?
- You may request that your CourseBank account and data be deleted by clicking Delete my account in your CourseBank account settings.
Please note: Deletion of your account and personal data is permanent and cannot be undone. CourseBank will not be able to recover your account or the data that is deleted. Any certificates earned will be deleted. Also, it will not be possible to open a new CourseBank account with the same email address or username.
2. How do I delete my account and personal data on CourseBank if my CourseBank account is linked to a social media account (e.g., Facebook or Google)?
- First, follow the instructions for unlinking your CourseBank Account from the associated Social account.
- Second, because we require a password to authorize account deletion, follow the instructions for resetting your password to create a separate password for your CourseBank account.
- Third, request that your CourseBank account and data be deleted by clicking Delete my account in your CourseBank Account Settings and provide your password when prompted
3. What happens when my account is deleted?
- After deletion, CourseBank will permanently deactivate your CourseBank Account, remove the active profile, retire your username, and remove you from CourseBank email lists. CourseBank will also permanently delete your CourseBank Account Profile and the personal data we use to identify you on our system. Note that there are some exceptions to deletion, as further described in our Privacy Policy (for example, course data will be archived to serve the mission for scientific research, and records used for financial reporting, audit, and compliance purposes must be retained).
4. Can my account be retrieved after I delete it?
- Deleting your CourseBank Account is a permanent action that cannot be reversed. CourseBank will not be able to recover your account or the data that is deleted. You will no longer be able to use your account to take courses on the coursebank.ph, or any other site hosted by edX.
5. After clicking “Delete my account” is my account immediately deleted?
- Account deletion, including removal from email lists, may take a few weeks to fully process through our system. If you want to opt-out of emails before then, please unsubscribe from the footer of any email. (Despite this processing period, account and data deletion is still permanent, so your account and data will not be able to be recovered once you’ve submitted a deletion request.)
6. What happens to my certificates if I delete my account?
- You will lose access to verified certificates and other program credentials. If you want to make a copy of these for your records before proceeding with deletion, follow the instructions for printing or downloading a certificate.
7. Can I create a new account if I change my mind?
- You are always welcome back to continue learning at CourseBank. Due to the fact that your previous account has been permanently deleted, you will need to start fresh with a brand-new account. You will not be able to use the same email or username for your new account.
- Your full name appears on the certificates that you earn, and on your learner profile page if you select Full Profile for profile visibility.
To change the full name in your CourseBank account
- At the top of any page, select the dropdown menu icon next to your username.
- Select Account.

- Next to the Full Name field click Edit, then make the changes you want to your full name.

- When done, click save.
Note:You can change your full name, but you cannot change your public username.
In most courses, you are asked to verify your identity before taking a verified course or taking each proctored exam. As you setup the proctoring software and prepare to take the exam, you will receive a prompt to take a photo of your photo ID using your webcam.
- Follow the instructions in the Secure Browser to position your ID in front of your webcam.
- When you are ready to take the photo, select Take ID Photo. There is a countdown before the camera takes the photo.
- Preview and confirm that your photo is clear, and can be used to verify that your name and photo match the photo of yourself and the name on your account.
- If the photo is clear, select the checkbox and select Confirm ID Photo. If the photo is not clear, select Retake ID Photo to try again.
Next Step: Scan your room and desk using a webcam.
- You will be asked to take a photo of yourself when taking a verified course or taking a proctored exam.
- When you are preparing to take a proctored exam, you must take a photo of yourself using your webcam to verify your identity. You will receive a prompt to take a photo of yourself using your webcam.
- Follow the instructions in the Secure Browser window to position yourself in front of your webcam.
- When you are ready to take the photo, select Take User Photo.
- Preview and confirm that your photo is clear, and can be used to verify that you are the same person as in the photo ID.
- If the photo is clear, select the checkbox and select Confirm User Photo.
If the photo is not clear, select Retake ID Photo to try again.
- When you have completed all the setup and verification steps, you will be redirected to the exam page. You may be prompted to re-login, complete login to be directed to the exam page. You have successfully set up the proctoring software, and the software has started recording a proctoring session in the Secure Browser.
Note: You must not close this Secure Browser page until you have finished your exam.
- Account Settings
- Change Your Password
- Update Your Email Address
- Change Your Full Name
- Change the Language for the Site
- Select Your Time Zone or Location
- Specify Additional Information
- Link or Unlink a Social Media Account
1. Account Settings
You access your account settings page by selecting the dropdown menu icon next to your username at the top of any site page.
Account Settings provides access to information about your account. The account settings page presents information in these categories.
- Linked Accounts lists social media and other accounts that you can connect to your account.
- Order History lists information about payments you have made, such as fees for verified certificates. For more information, see Verify a Payment.
2. Change Your Password
To change your password, follow these steps:
- At the top of any page, select the dropdown menu icon next to your username.
- Select Account.
- Select Reset Password
Note:The system sends a confirmation message to the email address in the Email Address field. - Select the confirmation link in the email message.
Passwords must contain:
- At least 8 characters
- At least 1 numeric character
- At least 1 alphabetical character
3. Update Your Email Address
You use your email address to sign in to your account. In addition, communications from your course teams are sent to this address.
To update your email address, follow these steps:
- At the top of any page, select the dropdown menu icon next to your username.
- Select Account.
- In the Email Address field, select your current email address and replace it with the new address.
- To save your changes, click anywhere on the page outside of the Email Address field, or navigate to a different page.
4. Change Your Full Name
Your full name appears on the certificates that you earn, and on your learner profile page if you select Full Profile for profile visibility.
Note: You can change your full name, but you cannot change your username.
When you verify your identity, the photo ID that you use for verification must show a name that exactly matches the full name used in your CourseBank account.
To change the full name used in your account, follow these steps:
- At the top of any page, select the dropdown menu icon next to your username.
- Select Account.
- In the Full Name field, make the revisions that you require.
- To save your changes, click anywhere on the page outside of the Full Name field, or navigate to a different page.
5. Change the Language for the Site
You can choose the language that you want the edx.org site to use during your visits. The language setting changes the appearance of menu options, button labels, and other elements of the site’s user interface, but it does not apply to course content.
Note:Your dashboard and course pages are available in more languages than the catalog pages where you search for courses and programs. If you choose a language that is not supported on the course and program catalog pages, those pages are displayed in English.
The list of languages in the language selection dropdown menu in the footer of the page reflects the languages that the page is available in.
There are two ways of changing the CourseBank site’s language:
5.1 Change the Language in Account Settings
To change the site language in your Account settings, follow these steps:
- At the top of any page, select the dropdown menu icon next to your username.
- Select Account.
- Select a Language.
5.2 Select Your Timezone or Location
You can select the time zone that you want course dates and times to appear in, and update the country or region where you live.
Note: If you do not select a time zone, course dates and times in the body of the course, on your Progress page, and on your dashboard display in the time zone that your browser settings specify. Other dates and times display in Coordinated Universal Time (UTC). Dates and times that use your browser time zone are in military time and are followed by a time zone indicator: for example, 17:00 Sept 16, 2018 IOT. Dates and times in UTC do not have a time zone indicator.
To select your time zone or location, follow these steps:
- At the top of any page, select the dropdown menu icon next to your username.
- Select Account.
- Select a Time Zone. The site saves your selection immediately.
- Select a Country or Region. The site saves your selection immediately.
6. Specify Additional Information
Additional account information is optional and includes the following information.
- Education Completed: The highest level of education that you have completed.
- Gender: The gender you identify as.
- Year of Birth: The year that you were born.
- Preferred Language: The language that you prefer to communicate in.
To view or change this information, follow these steps:
- At the top of any page, select the dropdown menu icon next to your username.
- On the Account Settings page, select Account Information.
- On the Account Information page, locate the Additional Information section, and then make your changes.
The site saves your changes automatically.
7. Link or Unlink a Social Media Account
You can link your CourseBank account to social media and other accounts, including Facebook, Google, and school or company accounts.
Note: If you link your accounts, whenever you sign in to the social media or other account, you also sign in to your CourseBank account automatically.
To link your account with another account, follow these steps:
- At the top of any page, select the dropdown menu icon next to your username.
- Select Account.
- On the Account Settings page, select Linked Accounts.
- On the Linked Accounts page, select Link Your Account under the name of the account that you want to link to your account.
Note: To unlink your account from a social media account, select Unlink This Account under that account name.
- For account security, your CourseBank account is temporarily locked if someone enters the wrong password several times.

To regain access after a lockout:
- Wait 1 hour
- Reset your password using the Forgot Password? link above the password field.

- Enter your registered email address. An email will then be sent with a link to create a new password.
1. You can use the Forgot Password? link on the sign in page.
2. After you select this link and enter your registered email address, CourseBank sends you an email message with a link to follow to reset your password.
3. If you are already signed in, you can reset your password on the Account Settings page
Note: The password reset message can only be sent to the email address which you used to register on cousebank.ph.
- If you see an email or password incorrect message, make sure that the email address you entered is the one that you registered for your CourseBank account.

If you continue to see this message, you can select Forgot Password? above the password field to change your password.
Common Login Problems
If you clicked Forgot Password but have not received an email message with a link to reset your password, check for these common problems:
- Is your email address entered correctly on the sign in page? Check for errors and try again.
- Did you enter the same email address that you used to register your Coursebank account? Reset messages are sent only to registered email addresses.
- Did you check your spam message folders? Check your spam folder for a message from [email protected].
- If the message is not there, try adding [email protected] to your contacts or your approved senders list, and then reset your password again
- Did you complete the account registration process for CourseBank.ph? To check, try registering again with the same email address. If the account does exist, a message will indicate that you entered a duplicate email address.
Other Error Messages
If you see a different error when trying to sign in, check for these common problems:
- Make sure that you are using a current version of Firefox or Chrome.
- Make sure that you have cookies and JavaScript enabled
- Try clearing your browser’s cache.
Most current browsers will work on CourseBank. For best performance, we recommend the latest versions of:
- Google Chrome (Recommended)
- Mozilla Firefox
Troubleshooting browser problems
Many problems with missing form fields, buttons that do not function, or other page display issues are caused by your browser. Here are some things to try to fix viewing problems:
- Make sure your browser is the most current version.
- Check your browser settings to make sure both JavaScript and cookies are enabled.
- Clear your browser's cache. Here are instructions on clearing your cache in Chrome or Firefox
The CourseBank platform is free and available for smartphones and tablets on both Android and iOS platforms.
While smartphones and tablets can be used to access and take courses, some more advanced problem types and content features may not function properly.
Note: CourseBank recommends that you complete all graded assignments in a web browser on a computer.
There can be several reasons why you did not receive an activation email.
- There was a typo or error in the email address when you registered on coursebank.ph.
- For some reason, you might not have successfully registered an account on coursebank.ph.
- The automated activation email message was caught by your spam filter.
- Your email provider might have blocked the automated email message.
Here's what you can do:
- Check your spam or junk mail folder for an email from [email protected].
- Add [email protected] to your email contacts or approved senders list.
- Try registering again with the same email address. If the account already exists, you'll see an error indicating that there is a duplicate email address.
- From the CourseBank log-in page, click Forgot password?. The password reset message will activate your account.
Still having problems? Contact us via Learner Support Request Form.
1. Kindly refresh the page and try again. If the problem persists, contact us through Learner Support Request Form.
Courses
1. Self-paced courses do not follow a set schedule and are open for 3 to 12 months. Course materials are all available as soon as the course begins. Assignments do not have start or due dates other than the official end date of the course.
2. Self-paced courses have a Self-Paced indicator in the Coursebank course catalog, along with a start date if the course has not yet begun.
3. In most self-paced courses, you will receive a certificate as soon as you have a passing grade in the course, even if you have not completed all course materials.
1. CourseBank offers a demonstration course that is designed to show learners who are new to Coursebank platform and on how to take a course.
2. Enroll in the Coursebank 101 demo course and try it out! You will learn how to navigate the Coursebank platform and complete your first course!
1. You can see your current grade in a course by clicking the Progress tab in the course.
2. All questions regarding grading and course content are best addressed in your course discussion forum. It is there that course staff can directly read and respond to your query.
Note: Most Coursebank courses post their grading policy in the course syllabus. Both the syllabus and the discussion forum are available once your class has begun.
1. Once you begin a CourseBank course, the View Course button will change to the Resume Course. The Resume Course button and the Incomplete status remains as long as the course is still available on CourseBank and will not change to show the course as completed.
2. To see your progress toward completion in the verified track you can view your course grading on the progress tab within your course. If the total column meets or exceeds the passing line then you have successfully passed the course.
3. If you are registered in the verified track and earn a certificate you may share this with others to show that you completed the course.
1. When you are working in a course, green check marks show your progress through the lessons. These check marks appear when you complete all of the content in a part of the course.
2. The green progress check marks are a visual aid and do not have any bearing on your course completion status or certificate eligibility. You can see your grading and progress towards the passing score in your course on the progress tab.
3. To receive a check mark in a content, you must complete all of the following actions.
- View all videos in the unit.
- Submit answers for all of the problems in the unit.
- View all HTML content in the unit for at least five seconds.
Note: (For some advanced assignment types added by course staff, a check mark may not appear. This does not impact your course grading.)
1. You can search through our many courses in the Coursebank course catalog. When you see a course that looks interesting click the course card to open the course about page. There you'll see information about the course contents, the start date and more information. To register for the course, click the green box that says Enroll Now.

2. This will lead you through registering on coursebank.ph if you haven't done so already. Once completed the course will be listed on your dashboard.
Note: The start date for the course will appear in the upper right. Please note that while you will be able to see the course on your dashboard before it starts, you will not be able to open the course or access materials until the course start date passes. If the course has started you will see a blue 'View Course' button. Click this to enter the course and begin.
1. You can see your course progress under the Progress tab on your dashboard. To receive a checkmark, you must complete all of the following actions:
- View all videos in the unit.
- Submit answers to all problems in the unit.
- View all HTML content (if there's any) in the unit for at least five seconds.
Certificates
1. CourseBank certificates do not show your final grade. Earning a CourseBank certificate indicates that you completed the course with a passing grade. Your final course grade appears with other course information on your dashboard once the course has ended, and a complete record of your scores on all course assignments and exams appears on the course Progress page. If you need a record of your performance in a course, use your web browser to print one of these pages.
2. In some courses, certificates have been set up to show the Hours of Effort, but it depends on the course team. For an approximation of the hours of effort a course represents, please refer to the course introduction page.
3. Some course certificate may also indicate the number of CPD Units earned and the PRC Accreditation Number.
1. To be eligible to receive a certificate a learner must pay and upgrade to the verified track before the course's deadline. The option to upgrade will not appear if the deadline has passed or if the course has ended and been archived.
2. In these cases it is not possible to earn a certificate in this session of the course. The upgrade deadline is usually 10 days before the end of a course, though it may be earlier in some courses depending on assignment deadlines.
3. To try for a certificate you may instead enroll again in a future session to try for a certificate. Most CourseBank courses are repeated.
- You can find the upgrade deadline on the right side of your course's Home page under important course dates.
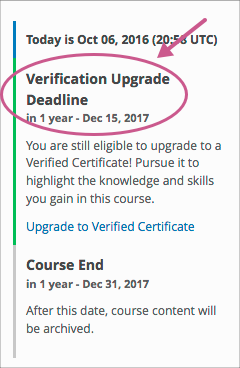
- Most courses now allow upgrading until 10 days before the end of the course, though some courses including those offering credit or that are part of a program, may close verified enrollment sooner.
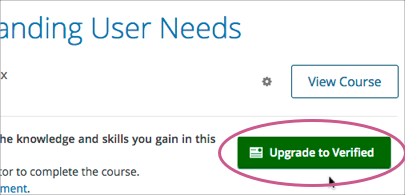
- To upgrade to a verified certificate
- Click on the green Upgrade to Verified button under the course on your dashboard or on the right side of the course tab.
- Upgrading to the verified track also involves verifying your identity. You need to take two verification photos with your webcam: one photo of yourself, and one photo of a government-issued photo identification card (e.g., passport, license). The verification you submit needs to be approved, which generally takes 2-3 business days. You can check the status of your verification on your dashboard.
- Once you've verified your identity, your verification status applies to all courses in which you've paid the verification fee. You don't need to submit a new set of photos for every course you upgrade to verified in, but you do need to make the payment for each course you want to upgrade in. Once approved, your photos will maintain their validity for one year.
1. A verified certificate shows that you have successfully completed a CourseBank course with a passing grade in the verified track. You must also have verified your identity using your webcam and a photo ID that has the photo and name on the same side, with a name that matches your full name in your edX account. For more details about ID verification, see Best Practices for Coursebank Photo Verification .
2. Verified certificates are available for a fee that varies by course. Many students use verified certificates to apply for jobs and university admissions.
1. CourseBank courses do not award free certificates. Certificates are awarded only to passing students registered in the paid verified certificate track. The enrollment fee for this track varies by course.
- CourseBank does not send individual printed copies of certificates. You can, however, print out your certificate using the printer icon in the upper right when viewing your certificate.
Note: Depending on the policies of an Institution, a learner may send a separate individual copies of Program Certificate.
Example: SPARTA Program (learner will receive a separate Graduation certificate upon completion of a learning pathway.)
CourseBank currently offers two types of certificates:
- Verified certificates for single courses
- Program certificates for programs
Note: Not all courses offer certificates, and archived courses do not award certificates.
1. Verified Certificates
- Verified certificates are available for a fee that varies by course. You earn a verified certificate by passing the course with the required grade in the verified track. You must also verify your identity on CourseBank before the verification deadline in the course.
2. Program Certificates
- You earn program certificates when you have earned a verified certificate for each course in the program. CourseBank offers program certificates for SPARTA program.
Once you've completed and passed a course, you may view and download your certificate and access it at any time from your Dashboard and Profile.
If it hasn't been generated, you may get your certificate by going to the course Progress tab and clicking the Request Certificate button.
Payment and Refunds
- We are very sorry you are unhappy with your course and would like to request for refund.
- Please read our Refund Policy before requesting for a refund.
- To help us process your request immediately, please click the link below and fill-out the form.
Note: Most refunds will be posted to your account within 5 to 10 business days. Processing may vary depending on your payment method or location.
- If you received a coupon code for a course, you may enter this on the payment page after selecting Upgrade to Verified or selecting the verified track when enrolling.
- After selecting the Verified track and before checking out, you will see the coupon code entry link below the course image on the payment page.

- Select this to open the code field. Once successfully entered you will see the updated price and can select Checkout, or Checkout with PayPal, to complete the transaction.
- Your course enrollment just got easier through GCash! Learners may now use GCash App to pay for all the courses in CourseBank by scanning the QR Code. To start using GCash QR, just select your preferred course at coursebank.ph and get your phone ready for payment.

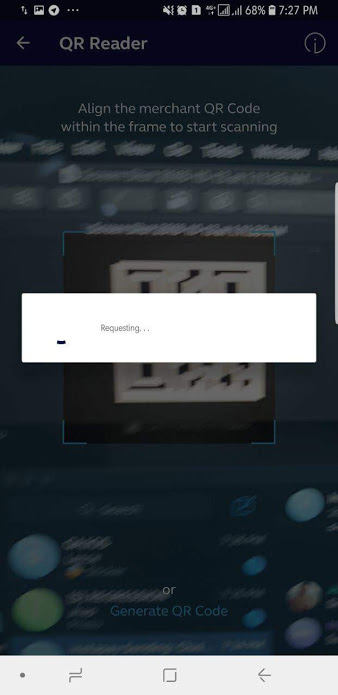
Step 1: Open your GCash App, tap on 'Pay QR' then tap 'Scan QR Code'.

Step 2: Align your mobile phone's camera over the GCash QR code to scan it. Wait for the next page to load..
Step 3: Key in the amount of course in the Payment screen and tap 'Next'.

Step 4: Select whether to pay with GCash or with GCredit. If you have an available QR Voucher, it will appear in the Discount row. To use voucher, select the arrow in the Discount Row. Double check all details then select Pay to confirm.

Step 5: You will see your in-app receipt on the screen. Click the download button on the upper right hand side, which allows the receipt to be saved as a photo in your phone's gallery. A pop-up message will confirm if you were able to successfully screenshot the receipt. Send the receipt to [email protected] with the following details:
- Name
- Username
- Course
- Receipt (Attachment)
Step 6: Enter the enrollment code/coupon code that you will receive from CourseBank to be a verified learner. Follow the steps on how to enter the enrollment/coupon code. You may now start your course as verified learner
- The Security code on the form is the CVN or CVV number from the back panel of your credit card (or front on American Express cards)
- CourseBank accepts all credit or debit cards that have a Visa, MasterCard Discover or American Express logo, PayPal payments, and Bank Transfer/Deposits. Most payments failures are because they were not approved by your bank. If you see a payment failed message please contact your bank or credit card provider for more information.
- If you see the payment pending on your credit or debit card account, then it may have been rejected by the payment processor due to the anti-fraud billing address or card verification checks. This indicates that either the billing address that you entered on the form did not match the billing address you have set with your card company or that the short 3 or 4 digit card verification number (CVV or CVN ) that you entered on the form from the back of your card does not match what the credit card company has for your active card. In these cases, the payments are just in a pending state and have not been received by CourseBank. Since the processor has not completed the transaction the funds will automatically return to your account within a few days. You are welcome to verify your information try to pay again.
- If you are receiving a receipt error for a PayPal order then likely there is an issue with your PayPal funding source. Please contact PayPal support for more information.
You can pay for the certificate track in a Coursebank course with a credit/debit card, PayPal, GCash or Bank Deposit/Transfer.
To complete a payment, enroll in the Verified Track or click Upgrade to Verified next to the course on your Coursebank Dashboard or on the right side of the main page within the course.
We currently accept credit and debit card payments from the following networks:
- American Express
- Discover
- Mastercard
- Visa
You can also do Bank Transfer/Deposits through the following bank:
Sterling Bank of Asia
- Account Name: MOOCSX PH. INCORPORATED
- Account Number: 245/6/000179/45
- Branch: The Fort
After successful deposit/transfer, please email the transaction slip to [email protected].
Please follow the format below when emailing the transaction slip:
Subject: PAYMENT {Course}
-
Indicate the following in your email:
- Full Name (same as the name you registered with on CourseBank)
- Username (username you registered with on CourseBank)
- Email Address (address you registered with on CourseBank, if different from address being used to send this email)
- Image Attachment (clear copy of deposit slip/receipt)
Once you've sent the email, wait for a confirmation email from us. This will normally take 3 business days. (As you're waiting for the confirmation, you may still continue with your enrolled course in *audit mode.)
Once you've received the email, you will see an enrollment code. This is a unique code which you may only use once. To use this code, you may read the instructions below:
- Go to your Coursebank Dashboard page.
- Find the course you enrolled for.
- Click the "Upgrade to Verified" button. This will take you to the Order page.
At the Order page, find the "Enter Enrollment/Discount Code" section at the upper left part of the page. Enter your enrollment code here then click "Apply". Once you've applied it, click the "Place Order" button at the bottom right of the page to finish the order process. (Ignore the Card Holder and Billing Information sections. You will NOT enter anything here.)
Once you've successfully ordered the course using your enrollment code, you have officially been enrolled on a Verified Course on CourseBank.
*Audit mode is the course mode where you can access the course content for free but you may not earn a verified certificate or CPD units.
If you are having difficulty completing the payment please see Why is my payment failing?
Coursebank Policies
Please note that we treat violations of our Terms of Service and Honor Code very seriously, and we have no obligation to offer refunds to users who violate these terms, even if their requests are made within the designated refund period. Similarly, we have no obligation to offer late refunds to users who do not receive a passing mark in the Content Offering, or who are otherwise unsatisfied with their final grade.
All eligible courses purchased can be refunded with 14 days. For pre-enrolled courses, Coursebank will offer you a refund until 14 days after the launch of the selected course.
Most refunds will be posted to your account within 5 to 10 business days. Processing may vary depending on your payment method or location.
For avoidance doubt, once you have earned a Course Certificate with your payment, or not satisfied with your grade, you are not eligible for a refund even if it is within 14 days. If you do not earn your Course Certificate within 180 days, your registration will expire and you will need to pay to re-enroll for the course.
Possible reasons for denied refunds.
For avoidance doubt, once you have earned a Course Certificate with your payment, or not satisfied with your grade, you are not eligible for a refund even if it is within 14 days. If you do not earn your Course Certificate within 180 days, your registration will expire and you will need to pay to re-enroll for the course.
We reserve the right, in our sole discretion, to limit or deny refund requests in cases where we believe there is refund abuse, including but not limited to the following:
- Refund request were received after the refund window.
- A course certificate has been earned by the learner.
- A significant part of the course has been consumed by the learner before the refund request has been made.
- Multiple refunds have been requested by a learner for the same course.
- Excessive refunds have been requested by the same learner in different courses.
- Learners who have their account banned or course access was disabled due to the violation of our Terms of Use and/or Honor Code will not eligible to receive refund
Refund Status
Learner will receive an email confirming that we have received the refund request and it is being processed.
To request a refund, please click instructions.
Last updated: November 06, 2018
Please read these Terms of Service (Terms, Terms of Service) carefully before using the https://coursebank.ph website (the Service) operated by Coursebank (us, we, or our).
Your access to and use of the Service is conditioned on your acceptance of and compliance with these Terms. These Terms apply to all visitors, users and others who access or use the Service.
By accessing or using the Service you agree to be bound by these Terms. If you disagree with any part of the terms then you may not access the Service. This Terms of Service agreement for Coursebank is managed by the the Terms and Conditions Generator.
1. Accounts
When you create an account with us, you must provide us information that is accurate, complete, and current at all times. Failure to do so constitutes a breach of the Terms, which may result in immediate termination of your account on our Service.
You are responsible for safeguarding the password that you use to access the Service and for any activities or actions under your password, whether your password is with our Service or a third-party service.
You agree not to disclose your password to any third party. You must notify us immediately upon becoming aware of any breach of security or unauthorized use of your account.
2. Links to Other Web Sites
Our Service may contain links to third-party web sites or services that are not owned or controlled by Coursebank.
Coursebank has no control over, and assumes no responsibility for, the content, privacy policies, or practices of any third party web sites or services. You further acknowledge and agree that Coursebank shall not be responsible or liable, directly or indirectly, for any damage or loss caused or alleged to be caused by or in connection with use of or reliance on any such content, goods or services available on or through any such web sites or services.
We strongly advise you to read the terms and conditions and privacy policies of any third-party web sites or services that you visit.
3. Termination
We may terminate or suspend access to our Service immediately, without prior notice or liability, for any reason whatsoever, including without limitation if you breach the Terms.
All provisions of the Terms which by their nature should survive termination shall survive termination, including, without limitation, ownership provisions, warranty disclaimers, indemnity and limitations of liability.
We may terminate or suspend your account immediately, without prior notice or liability, for any reason whatsoever, including without limitation if you breach the Terms.
Upon termination, your right to use the Service will immediately cease. If you wish to terminate your account, you may simply discontinue using the Service
All provisions of the Terms which by their nature should survive termination shall survive termination, including, without limitation, ownership provisions, warranty disclaimers, indemnity and limitations of liability.
4. Governing Law
These Terms shall be governed and construed in accordance with the laws of Philippines, without regard to its conflict of law provisions.
Our failure to enforce any right or provision of these Terms will not be considered a waiver of those rights. If any provision of these Terms is held to be invalid or unenforceable by a court, the remaining provisions of these Terms will remain in effect. These Terms constitute the entire agreement between us regarding our Service, and supersede and replace any prior agreements we might have between us regarding the Service.
5. Changes
We reserve the right, at our sole discretion, to modify or replace these Terms at any time. If a revision is material we will try to provide at least 30 days notice prior to any new terms taking effect. What constitutes a material change will be determined at our sole discretion.
By continuing to access or use our Service after those revisions become effective, you agree to be bound by the revised terms. If you do not agree to the new terms, please stop using the Service.
Contact Us
If you have any questions about these Terms, please contact us at [email protected].
Coursebank applies the Honor Code upheld by EdX. To read more about their terms, read the Honor Code section at EdX's Terms of Service.
COLLABORATION POLICY
By enrolling in a course on Coursebank, you are joining a worldwide online community of learners. The aspiration of Coursebank is to provide anyone with an internet connection access to courses from the best institutions in the Philippines and to provide our learners the best educational experience internet technology enables. You are a part of the community that will help Coursebank achieve this goal. Coursebank depends upon your motivation to learn the material and to do so with honesty and academic integrity. In order to participate in Coursebank, you must agree to the Honor Code below and any additional terms specific to a course or program. This Honor Code, and any additional terms, will be posted on each course website.
HONOR CODE PLEDGE
By enrolling in a Coursebank course or program, I agree that I will:
- Complete all tests and assignments on my own, including peer evaluation, unless collaboration on an assignment is explicitly permitted.
- Assess and mark peers’ outputs in accordance with the rubric provided.
- Maintain only one user account, unless Coursebank has approved the use of a separate user account in connection with an employer-sponsored or university-sponsored program.
- Not let anyone else use my username and/or password.
- Not engage in any activity that would dishonestly improve my results, or improve or hurt the results of others.
- Not post answers to problems that are being used to assess learner performance.
VIOLATIONS
If you are found in violation of the Terms of Service or Honor Code, you may be subject to one or more of the following actions:
- Receiving a zero or no credit for an assignment;
- Having any certificate earned in the course or program withheld or revoked;
- Being unenrolled from a course or program; or
- Termination of your use of the Coursebank Site.
- Additional actions may be taken at the sole discretion of Coursebank and Coursebank Member course providers.
- No refunds will be issued in the case of any corrective action for such violations.
Note: Honor Code violations will be determined at the sole discretion of Coursebank. You will be notified if a determination has been made that you have violated this Honor Code and you will be informed of the corresponding action to be taken as a result of the violation.
CPD Courses
- Learners who wish to take courses with CPD units must take note of the following below:
- Learners must obtain the required certificate upon the completion of the course.
- Learners must have the CPD Credentials that are applicable to the course.
- The CPD Credentials will be used to verify if you may earn CPD units. CPD Credentials are your professional information. After finishing a course with CPD units, Coursebank will grant you the CPD units earned upon verification of the CPD Credentials that you have added to your profile. (Your privacy is protected, any information received will not be disclosed and will be used only for verification)
- To add CPD Credentials to your profile, follow the steps below:
- At the drop-down menu found on the upper right hand corner of the navigation bar, beside your username, click CPD Credential;

- Click Add New Credential;

- Select your correct PRC License Type; and

- Enter your correct and valid PRC Registration Number.

- After you have successfully registered the correct and valid information, you may start earning CPD units from Verified Courses you are enrolled in. You may only earn the corresponding CPD Units to your Credential if your enrollment to the course offers a Verified Certificate and the course offers the corresponding CPD Units (indicated at the course's About page).
Learner Record
When you share your program record, the institution you share it with receives the following information about your performance in each of the program's courses.
- Your name, Coursebank user ID, and email address.
- The course name and course ID.
- The name and type of the program that the course is a part of.
- The institution that offered the program.
- The number of times you started the course as a verified learner.
- The date that a certificate was awarded to you for the course.
- Your percent grade for the course. If you started the course more than once, this will be the highest earned grade that you earned.
- Your letter grade for the course. If you started the course more than once, this will be the highest earned grade that you earned.
You can view and share your program record on the My Learner Records page. You can find this by navigating to your Dashboard and selecting the Profile tab.